Wrapping your side mirrors is an excellent way to preserve the original paint job on your car or modify its look. The actual process is the application of vinyl wrap, which is available in different colors, and its appearance can be modified. If you are looking for a change, trying to match the car’s body color, or simply want to protect the side mirrors from scratches or other external influences, side mirror wrapping can be a gratifying DIY job. This guide will help you through the process from start to finish to give yourself a polished, professional finish.
What is Vinyl Wrapping?
Vinyl wrapping is a process in which a thin layer of vinyl is placed over the exterior of your car. It is popular for car customization because it is temporary compared to paint, and one can easily reverse it. The material is hard and can withstand different weather conditions; it can also last for several years if it is well-maintained.
Tools and Materials Needed
To wrap your side mirrors effectively, you’ll need the following tools and materials:
- Vinyl wrap film
- Tape measure
- Heat gun or hairdryer
- Squeegee or hard card
- Utility knife or precision cutting tool
- Cleaning solution (isopropyl alcohol recommended)
- Microfiber cloth
- Gloves (optional, for better grip)
Step-by-Step Guide to Wrap Side Mirrors
One of the most delicate car parts which can be easily upgraded and protected at the same time is the side mirrors of the vehicle. Even for a beginner, this guide describes the whole procedure in such a way that it is very easy to follow and produces the best professional results.
Step 1: Select Your Vinyl
Choosing the right vinyl is very important for the success of your project. Some of the available vinyl finishes include flat, high-gloss, semi-gloss, carbon fibre, and metallic. All the categories have their own features and advantages. Matte and satin finishes give a contemporary, low-profile appearance, while gloss and metallic are shiny, giving the vehicle a reflective shine.
Carbon fibre vinyl is ideal for those who want to make their vehicles look more aggressive and futuristic. Think about the overall look that you prefer and how it will fit the shape of your car. It is advisable to use the best vinyl in the market so that the material is long-lasting and easy to apply. Higher-grade vinyl not only lasts longer but also sticks better and is more convenient to use during the application of the coating.
Step 2: Prepare the Side Mirrors
It is crucial to prepare the side mirrors correctly so that the vinyl sticks well and does not look sloppy. First, the mirrors should be washed to ensure that there is no dirt, greasy, or any wax on the mirrors. Carwashing soap or a combination of isopropyl alcohol and water should be used to clean the surface in a way that does not harm the underlying material.
Lastly, the mirrors should be thoroughly dried using a microfiber cloth after washing them. The absence of impurities on the surface guarantees that no debris will be trapped beneath the vinyl, which jeopardizes the appearance of the wrap and its durability.
Step 3: Measurement and Cutting of the Vinyl
Closely measuring and cutting will enable one to ensure that the vinyl properly fits on the mirrors without having to trim off too much. Take the side mirror’s measurements with flexible tape and add two or three inches to all the dimensions to make them easier to handle and apply.
The vinyl should be cut into strips that are slightly bigger than the size of the mirrors on the surface. A little extra provides the flexibility of working with the vinyl and covering the mirror without developing tension lines or a tear. The excess vinyl will be removed in the subsequent sessions to achieve the best fit possible.
Step 4: Applying Vinyl
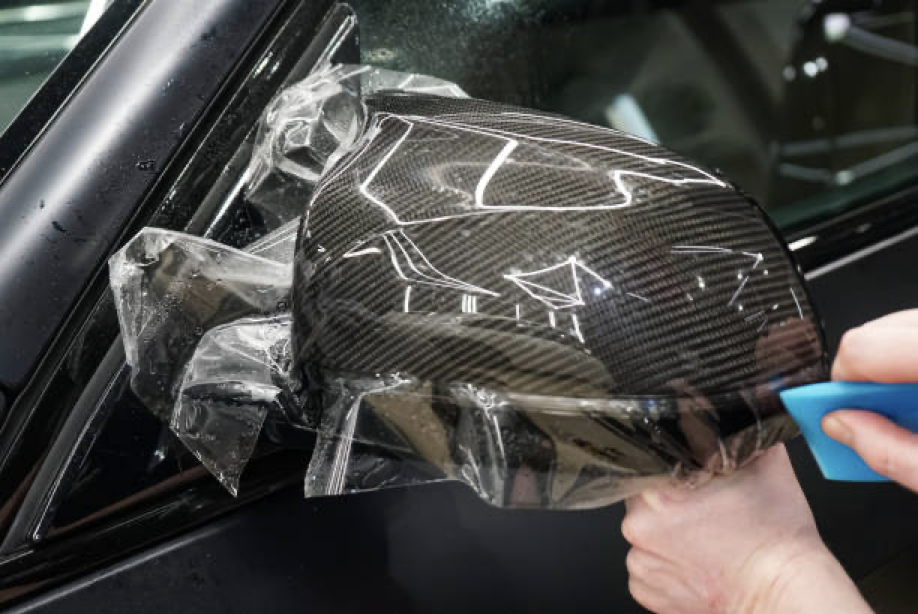
The most difficult part is the application of the vinyl, which requires a lot of patience and precision. First, strip the covering of the vinyl so you can access the adhesive part. Place the vinyl over the mirror with precision from one end to the other without missing any part of the mirror. Place your fingers on the surface and apply pressure to push the vinyl down and ensure it lies flat.
From the centre of the mirror, work inwards with a squeegee to force out all the air bubbles and make the vinyl stick to the mirror surface. This step has to be taken lightly so as not to cause any form of wrinkles or creases on the vinyl. In case of the formation of wrinkles, one should lift the region with a wrinkle and use the heat gun to warm the vinyl to make it softer to allow stretching and reapplication on the surface.
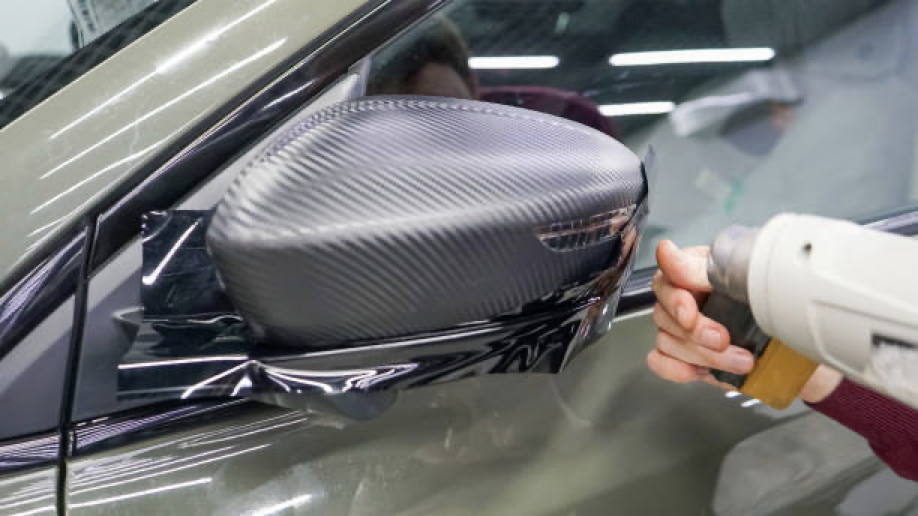
Step 5: Heat for Flexibility
How to warm the vinyl – use a heat gun or hairdryer and heat the vinyl slowly. This step is important as it makes the vinyl more malleable and easier to shape into the contours of the mirror frame. Warm the vinyl and then pull it correctly to fit the mirror. Do not overheat the vinyl, as this may cause it to melt.
Step 6: Trim the Excess Vinyl
Once the vinyl is fully applied to the surface, you can use a utility knife to remove the unnecessary parts. Make clean and neat cuts because you do not want to harm the mirror or cause any damage to the paint of the car. This step will help you to give your wrap a nice and professional look.
Step 7: Post-Application Heat Treatment
After cutting, apply heat to the vinyl once more. This post-application heat treatment aids in setting the vinyl and guarantees that it covers the edges tightly. It also aids in removing any small unevenness or the presence of bubbles which may have occurred in the process of painting.
Step 8: Inspect and Finish
Inspect your work closely. Check for any trapped bubbles, uneven surfaces or loose flaps. If you discover some defects, you need to use the heat gun and squeegee to fix them. After that, wipe the vinyl once more with a microfiber cloth to make sure it is clean and free from any marks.
Conclusion
Decorating side mirrors is not just about personalizing your car and making it unique but also about preserving the car’s accessories. However, with the right tools, quality materials, and time, one can come up with a good and lasting job. This DIY project can be an enjoyable one and a good way to add a little personality to the car on the road.
- ©2025 GarageTool
- Privacy policy
- Terms of service
- Sitemap